
Skeleton Bone Tutorial
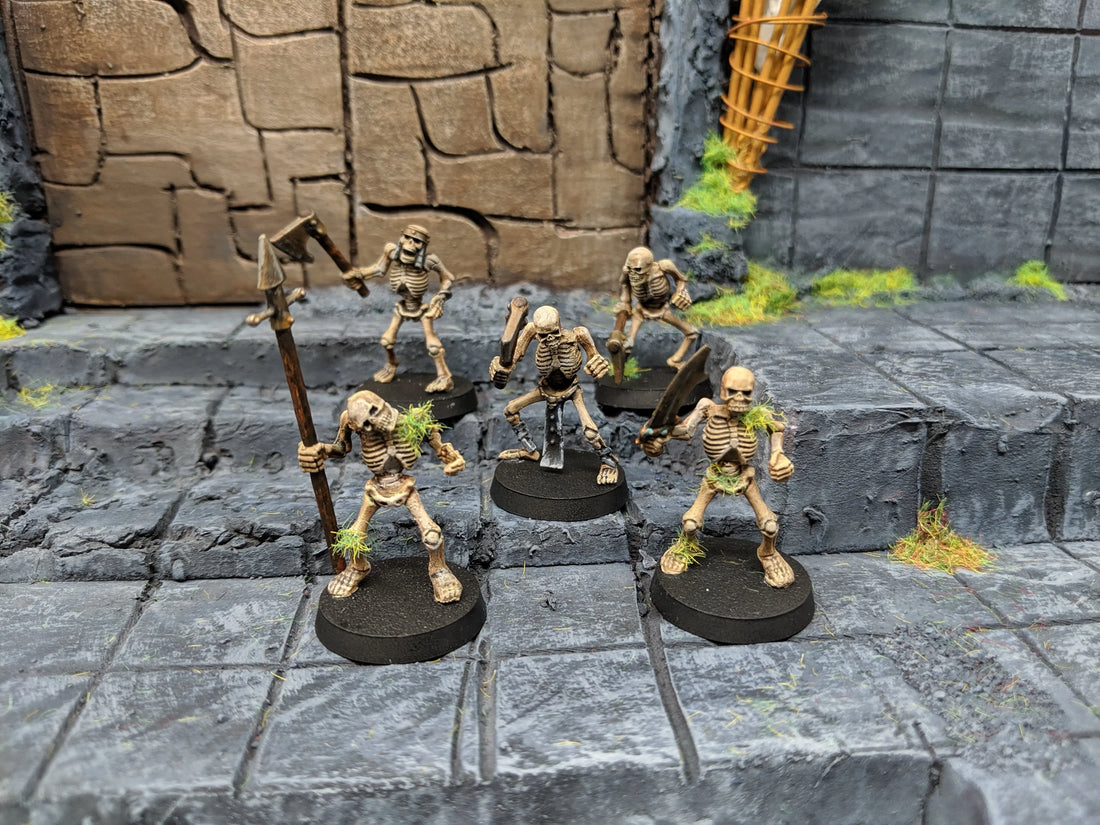
I hope I can provide as many of these as I can, but here is a long method for painting skeleton bones.
Skelton Bones
Difficulty= Intermediate
Paints required
Zandri Dust
Karak Stone
Wraithbone
Reikland Fleshade
Agrax Earthshade
Nuln Oil
Zandri Dust
Morghast Bone
Lahmian Medium
Hi everyone! I want to present to you a tutorial for painting skeleton bones. I have tried a few different techniques, and this is the formula that I like the most. Of course, you can do the old move of Ushabti Bone with an Agrax wash. I like to have some more red, dark brown, and black in my bones, and have them lean toward a more yellowish tone rather than just bone color. The tutorial below isn’t that difficult, so give it a try!
Step 1:
Basecoat the mini in Zandri Dust. Do 2 thin coats, but make sure to get complete coverage. Let your first coat dry completely, then do a second thin layer.

Step 2:
Here you want to drybrush Karak Stone. This will add another layer of color to the bones, and create some depth. You want some nice coverage here, but be sure to leave some of the Zandri Dust. This is not a super noticeable step, but it will brighten the bones a bit.

Step 3:
Drybrush of Wraithbone. It’s a nice, near white color that will make all the joints and raised areas pop. You want to get about 30% coverage here. For example, the ribs will have nice Wraithbone colored lines on them, but the Zandri and Karak are still visible closer to the innards. You can play around with the 30% number, but start here for your first time.

Step 4:
A 1:1 wash of Reikland Fleshade and water. You want to cover the whole model here. I dipped my brush in the Reikland, put the wash on a palette. I did 2 drops. Then I dipped my brush in water, and added the water to the wash, twice. Mix up the 1:1 wash and water, and then apply it to the whole model. Try to not let it pool in crevices too much. This step will help start defining details, as well as tone the whole model a little more red/brown. Let this step dry completely before you move on.

Step 5:
Another wash of Reikland Fleshade. You want to do a similar 1:1 mix like Step 4. Cover the whole model, and definitely let it dry again before moving on. You can see the reddish/brown taking over now, but don’t worry.

Step 6:
Here is where things get a little trickier. You want to give the bones a wash of Agrax Earthshade. First, you want to thin out the Agrax, at a 2:1 ratio. You want to do two drops of Agrax, and one drop of water. From here, you want to be pretty deliberate with your Agrax wash, and get it into these areas:
- in between all ribs, front and back
- in the creases of the legs and arm bones
-where the hands meet the arm bones
-in the bones in the hands
-where the feet meet leg bones
-in the feet bones
-in the mouth and eyes, don’t go too heavy here
-elbows and knees
- pelvis

Step 7:
Here is where you wash certain spots with Nuln Oil. You want to put it in the eyes, elbows, knees, and where the hands meet arms, and feet meet legs. I also put some where the spinal column meets the pelvis, as well as directly in the middle of the ribs. Let this dry before moving on.

Step 8:
This is probably the hardest step so bare with me. First, you want to mix your paint. You need a 2:1:1 ratio of Lahmian Medium: Zandri Dust: Water. Then with a layer brush, you want to put this Zandri mix in the middle of the bones. Get the knees, shoulders, pelvis bones, but just the raised points. Clean up any sites where previous washes may have bled over too much. It’s a thin mix, so some of the red and brown tones from underneath should be visible still. However, the Zandri will give you the yellowish/bone color again. Once this is done, get a small drybrush, and do the hands, feet, face and ribs. Don’t go too heavy on the drybrush part, but get that yellowing bone color back in again.

Step 9:
Last step! Here is where you want to go with the Wraithbone. When bones clink against each other, or are struck with weapons, the smudge and dirt is wiped off and the bones chip, going back to their whitish colors. You can do this similar to how I did Step 8, but do the opposite. Start with a drybrush, a very light one. Get the outermost part of the ribs, lightly on the joints, and hit the face. Once done with the drybrush, go in with a layer brush, and hit any bones that don’t look right, or that you may want to fix.

There you have it! Skeleton bones with layer and depth, reds and browns, and black.
